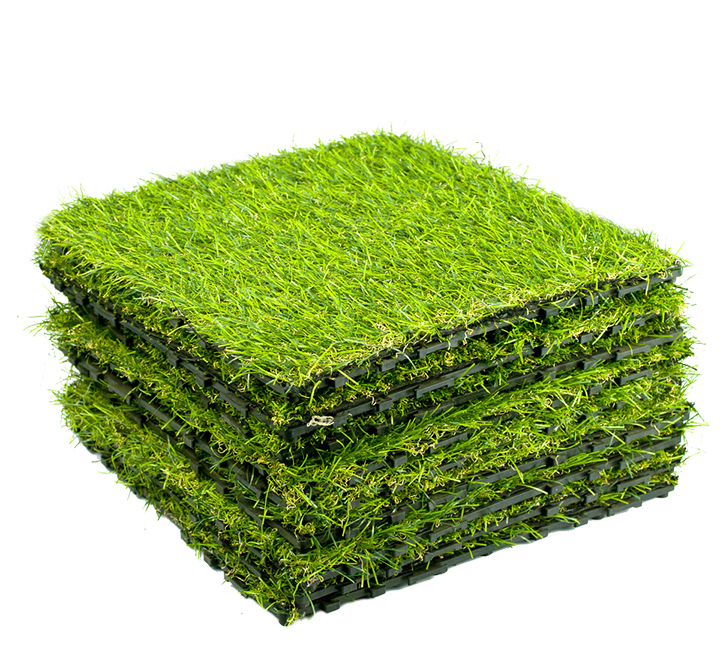
DIY Installing Synthetic Turf Like A Pro
We’ve heard all about the magic of synthetic turf, but how does one install it? There’s no use prattling on about how it is an evergreen grassland in our backyards if we don’t know the process of laying it in our backyard. (Though you can check our article on the benefits of synthetic turfs here.) Especially home improvement DIY enthusiasts want to know all the details.
So, today, I’m not going to waste your time. I’m going to give you all the information you need to successfully install a synthetic turf on your lawn, starting from the prepping to the after-care tips.
Let’s begin!
Preparation Stage
Make sure the soil is suitable
Depending on where you’re living, the issue of soil drainage may arise. If the soil is poor at draining, you will need to install an artificial system.
- Take measurements
This one’s a no-brainer, but we still want to lay it out. Take measurements of the perimeter you want to install the synthetic turf in.
- Make sure the soil is clear
By that, we mean: check under the ground for obstructions like rocks, electrical lines, sprinklers, and water pipes.
Relocate the electrical lines because they will get damaged by the synthetic turf. Relocate the sprinklers and rocks to make sure the future carpeting can be level. And make a way out for your water pipe system with additional tubes, so that you don’t run into drainage problems.
- Get rid of living plants
Using a weed killer, get rid of any unwanted roots and weed. You should do this 2-3 weeks before as these agents take time to work.
- Make some room
You have to do a little digging to clear some space for your new carpet. Get rid of a few inches of the soil layer and level it using your boots/hand tamp.
Lay Your Land
- Install a bender board
Before you can start laying anything, you need to mark out the area. Clearly distinguish between your turf area and larger lawn.
- First Layer: Base Material
This step is necessary for improving the drainage of the soil. It also prevents future sliding/slumping of your synthetic turf. Anything that can absorb liquids quickly is a good contender, for example, you can use granite, crushed gravel/rock, stones, smaller rocks.
Spread and pile your base materials about 4 inches in, with the help of a wheelbarrow or a plain old shovel.
- Second Layer: Sharp Sand
You want the base you just put to be firm so, you need to level it with a layer of sharp sand. A broadcast spreader is perfect for this job but your shovel will do, too. Lay it in 1-1.5cm thick.
(If you’re unsure what a broadcast spreader is, you can find out in our gardening tool names for lawn maintenance article.)
- Water & Tamp
Now, to seal everything in, water your base materials without overdoing it. Then tamp the ground using plate tampers or hand tampers. To get DIY, you can simply get a wooden plank and put weight over it, like a hammer, to tamp your ground.
You will find that your base materials will lower in height, which is exactly what you want! The new size should be about 9/10th of the original. It’ll start feeling like a hard slab but don’t worry, it won’t affect the drainage capacity.
Installation Process
- Mark the area
To make the rest of the work easier on you, use chalk/spray paint to map out the perimeter where you want to install the synthetic turf. To get more out of it, draw a border for laying your fabric seam, too.
- Cut the turf
On an even surface that is not your installation area, roll the synthetic carpet out. Then, measure out the length you need and make cuts on the edges as a guideline, leaving an inch of space to account for miscalculations.
As you roll the turf back towards yourself, you will find the edge cuts. Use them to cut the desired amount fully. You can use the edges to draw a vertical chalk line and cut along the line for a straighter edge. You will most likely need several slices of the carpet to make your flooring.
- Install the synthetic turf
Now, you can finally lay down the carpet. But make sure you don’t drag it along your base! That will undo all the hard work you put in during prep. Lightly air it out over the installation area as you roll it out, as if you’re dusting, then place it down.
- Sew the seams
When placing the pieces side by side, make sure that you leave space for sewing the seams. They should angle upwards, a bit like a tent, with minimal gaps.
You will need help from additional people when placing seam tape underneath the carpet. Cut it as long as your turf border and secure it on the corners with 6-inch nails, having your helpers hold up the carpet edge as you pour glue.
It’s necessary to keep it held and away from the glue until you gradually start pushing it in from one edge. Once you’re done, hammer in nails along the perimeter to seal the turf in, making sure not to nail in any grass leaf fibers.
After Care Tips
- Trim excess grass from the edges
- Lay sand in-fill, to make the turf look more natural
- Water your lawn to set the in-fill
- Brush the leaves once it’s dry, so that it all looks uniform
Conclusion
Installing a synthetic turf on your own is one heck of a DIY project, but it is possible with our handy guide. Preparing the area well before you install is necessary to avoid future problems with slumping and drainage. And while it is a DIY, you will need some extra hands when sewing the seams.
We hope you found our guide to be of use.
If you aren’t comfortable with soldering this by yourself, you may contact us for our services!


Recent Comments